Helloooo,
I thought I would share my amateur talent for doing nails. These are MY nails, and this is probably one of the reasons that they look kind of amateur. It's kind of hard to do your own nails. Some of these designs are the result of my imagination, and some I copied from other placed on the internet. I will not take full credit.
British Toes

Yes, This is my toe. I apologize, but this is an original design inspired by my love for England. I used basic Nail polish dark blue nail polish for the base coat and the a bright red nail art pen for the red cross. (Make sure your base coat is completely dry before you apply the red nail art pen, or you WILL have issues.) I used a white nail art pen for the white outline, and the last thing I did was apply a clear coat (after EVERYTHING is dry...this could also cause issues if you do not allow it all to dry.) This takes practice and a steady hand! You may want to ask for a friend's help. I just painted my little toes red, but you could also switch up from red to dark blue on your little toes.
Pink Roses

Okay, this is a not-so-original design. I actually got this design from a great youtube tutorial. Here it is-->
http://www.youtube.com/watch?v=KT5z1T05-_c&feature=PlayList&p=9F1F14DB750ADEB9&playnext_from=PL&playnext=1&index=8 The person that did this tutorial did a much better job than I did, but this was my first attempt. I'm sure I will get better with time. Sorry for the dark picture. I actually did put green "leaves" on my nails but you can't see them in the picture. I used a white nail art pen, black base coat, light pink nail polish, and a lovely green for the leaves. I used a basic metal nail dotter for the flowers. It's not like the one she uses in the tutorial but does just as good of a job. You should be able to purchase one at any beauty supply store.
Green Nail Garden

Sorry this picture is blurry. Now this one is my favorite, and the most tricky and time consuming. It's my own design. It looks absolutely great once you get it done though! I had so many people compliment my nails! Anyways, I used a bright green nail polish for my base coat, and for the flowers I used orange, yellow, white, dark blue, light blue, and pink acrylic paint (yes, just like the kind you paint with.) I used a tiny tipped regular paint brush and just did different flower arrangements and colors on each nail. It is nesisary that you put a clear coat on after you are done and the nails are dried. This will keep the acrylic from flaking off. You must have a steady hand and lots of time! These flowers are very small and take a very small brush. You might also want a friend to help you with these. Great for spring!
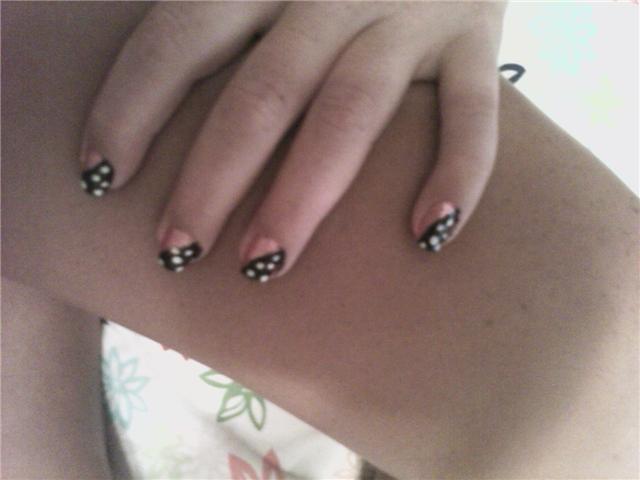
Pretty Frenchy

This one is very easy, and it is very pretty and sophisticated. It is perfect if you need a quick and cute nail design. I cleaned my nails first getting rid of any dirt or old polish, and then I used the Sally Hanson French Manicure Pen on my tips. It's a great tool for great looking tips! I free handed my tips, but if you do not have a steady hand, you may ask a friend or you can use manicure stickers to insure a clean and straight line or simply a piece of paper and use nail polish remover to get rid of unwanted lines. The flower is just a nail art sticker that I bought in a pack at Walgreens. They were pretty cheap and really pretty. These are called 3-D nail art stickers because there is a little crystal in the middle of the flower. Flowers come in different sizes in case you would like to apply smaller ones to the rest of your nails. Apply clear coat after sticker, and your done!
I will probably add more designs later! Hope you enjoy! Ask me any questions!
.jpg)